It feels like only recently that SSDs landed to replace our creaking mechanical hard drives, delivering an incredible boost to loading times across our operating systems, software and games. But in fact, the newest and fastest form-factor of SSD – M.2 – has already been around for a fair few years itself, and can now be bought at a pretty affordable price.
That means it’s a good time to learn how to connect and install these diminutive wafers of tech, which somehow run things faster and cooler than anything preceding them. The good news is that M.2 drives are relatively simple to plug into your PC – not requiring any cables or extraneous faff.
But adding any hardware to your PC’s innards is always a sensitive job, so this guide is here to help you install your new M.2 drive properly.
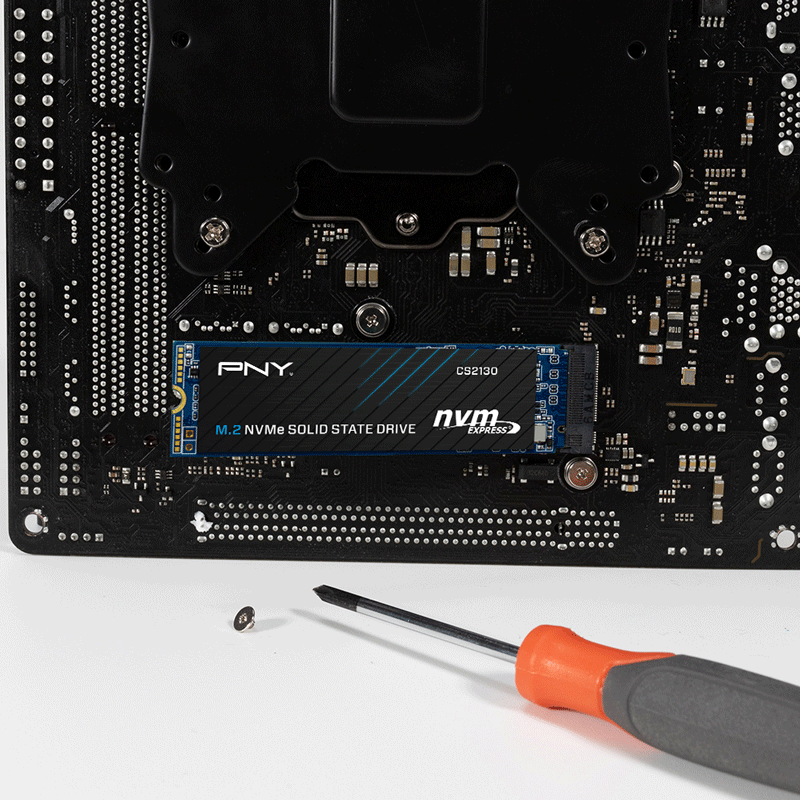
1. Is your motherboard compatible with your M.2 key?
When buying an M.2 SSD, it’s important to know whether your motherboard is compatible with it. M.2 is just the stick-like form factor of the SSD, but the really important detail is in the fact that there are slower SATA M.2 drives and faster NVMe M.2 drives, which use different ‘keys’.
Even if your motherboard has an M.2 slot, its compatibility with your new M.2 drive will depend on whether the slot is compatible with B Key drives, M+B Key or M Key drives.
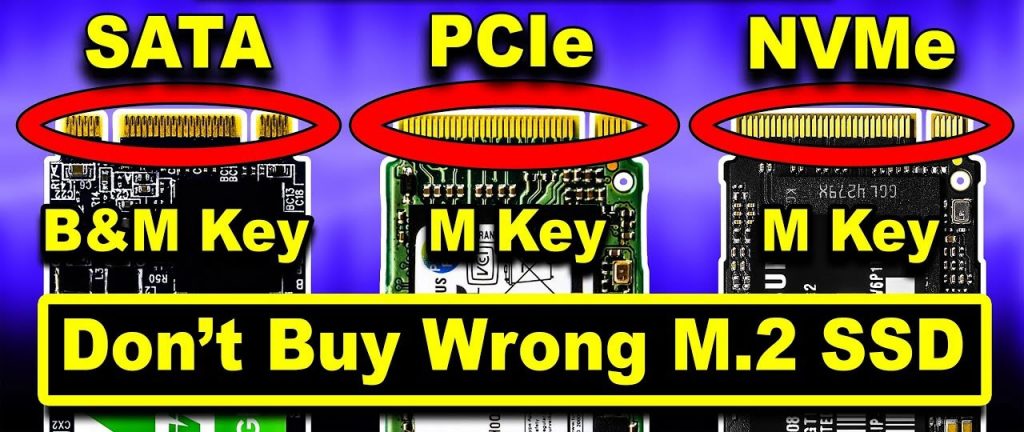
So it’s worth researching your motherboard to figure out whether it’s compatible with your M.2 drive before pushing on.
. Insert the M.2 drive into your PC
The location of the M.2 slot on your PC motherboard varies between different manufacturers and board models. The most common places to find an M.2 slot are between the GPU and CPU, or in the lower right part of your motherboard.
Some motherboards even have a special metal plate that covers the M.2 drive and keeps it cool, so you may need to unscrew that first.

As you can see above, our M.2 slot is rather inconveniently sandwiched between a graphics card and processor. To comfortably insert the new M.2 drive, we’ll need to carefully remove my GPU and set it aside.
Once you’ve got all obstructing hardware out of the way, it’s time to insert your M.2 drive into the M.2 slot.
First, unscrew the mounting screw near the M.2 slot. If your M.2 drive came with any mounts, you should screw them in now. This will ensure that when you screw down the drive it will be parallel to the motherboard rather than angled down towards it.

With the mounting screw out and the drive mounts in (if provided), carefully insert your M.2 drive into the M.2 slot at a 30-degree angle from the motherboard.
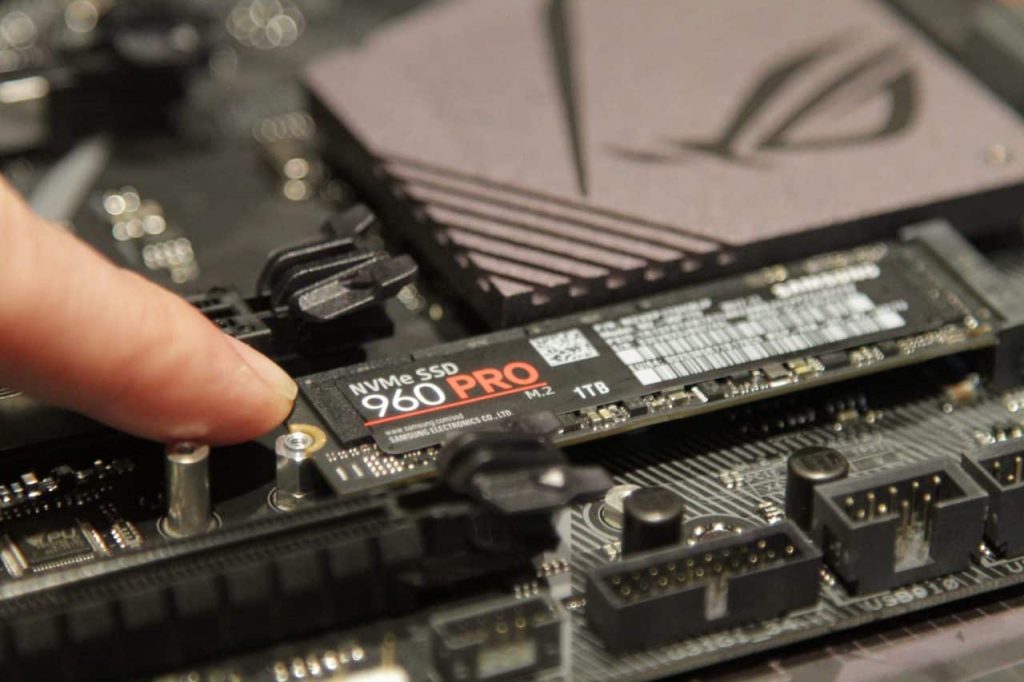
Once inserted, it should dangle at that 30-degree angle up from the motherboard.
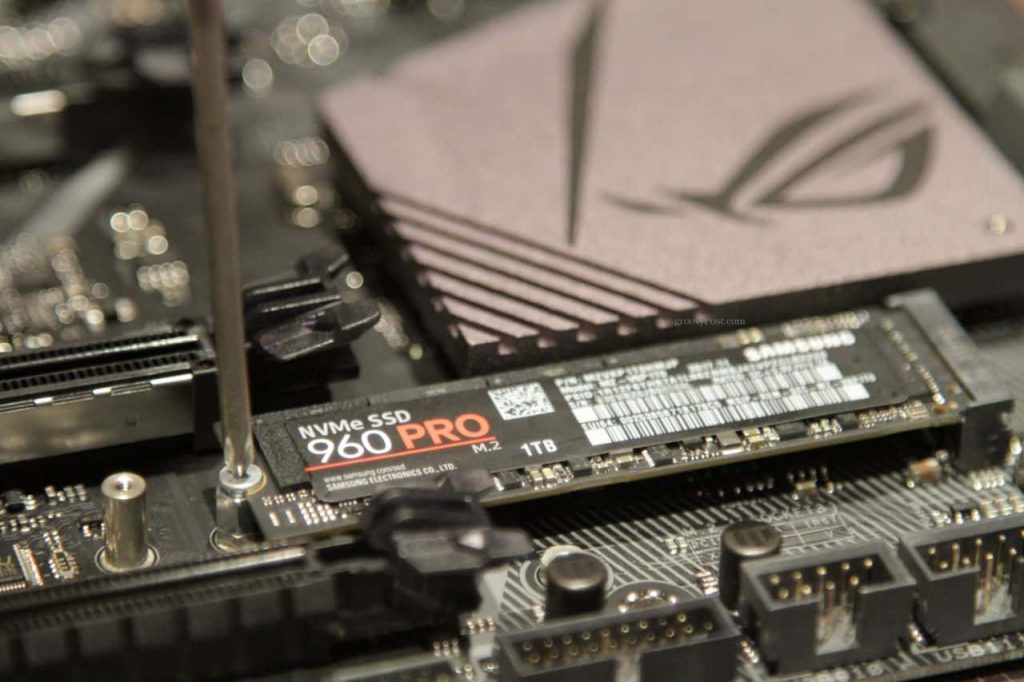
Gently press the upward-angled end of the drive down towards the screw mount, then secure it with the mounting screw. Don’t overscrew it, but screw it in enough so that the M.2 drive isn’t wobbling.
Reinsert your GPU and any other hardware you had to remove previously, close your PC case, and plug everything back in.
3. Install your M.2 Drive in BIOS
Before you install your M.2 drive on Windows 10, there may be a few things you need to configure in your motherboard BIOS. The tweaks you should make will depend on your motherboard’s capabilities, but one in particular may be essential if you want Windows to recognise your M.2 drive.
Go to your BIOS (usually by pressing F2 or Delete when your PC is booting).
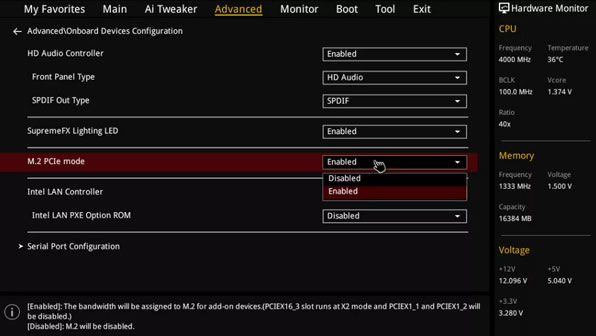
The exact process from here will vary depending on your motherboard. On our ASUS Z97 Pro Gamer board, we went to Advanced > Onboard Devices Configuration > M.2 PCIe mode and changed the dropdown to ‘Enabled’. On other Asus boards, you go to Advanced, click the dropdown next to ‘PCI Express X4_3 Slot Bandwidth’ and change it to M.2 Mode.
Save and exit.
4. Install your M.2 Drive in Windows 10
Your M.2 drive should now be recognised by Windows 10. Log into Windows 10, type ‘disk management’ into the Start search bar, and choose the option to create hard disk partitions.
Here, your new M.2 drive should appear in the lower half of the window with ‘Unallocated’ space.
What you do from here depends on whether you want to run Windows 10 from your new NVMe or whether you just want to use it as a regular drive. We have a guide on hand if you want to move Windows 10 over to your new M.2 drive.

If you just want to use your M.2 drive as a regular drive, right-click the bar that says ‘Unallocated’ next to it > New Simple Volume then follow the instructions to create your drive. One important thing to note during the wizard is to set the ‘File system’ as NTFS. Beyond that, give the drive a name and most of the other options should be fine as they are.
Once that’s done, your swift new NVMe is ready to use! Enjoy a level of read/write rates like you’ve almost certainly never experienced before.
Also can read article “Migrate from hdd to ssd/nvme“


